필요성
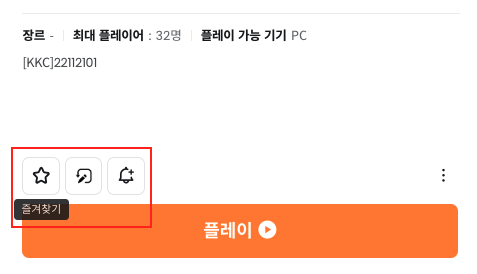
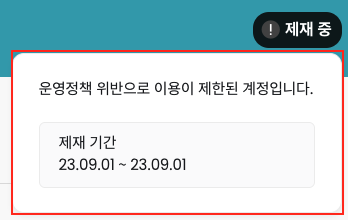
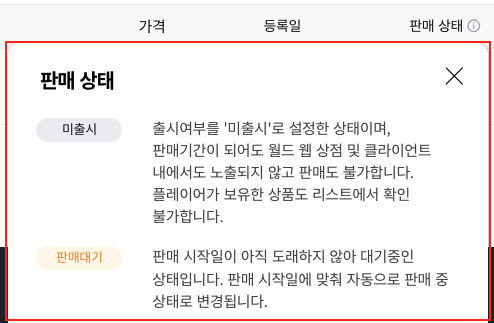
메이플스토리 월드에서 Tooltip을 사용하는 부분이 있는데, 비슷한 기능을 수행하는 Tooltip 관련 컴포넌트가 총 3개나 있다.
이를 새롭게 만든 <v-tooltip /> 컴포넌트를 통해 중복된 로직을 하나로 통합해 유지보수성을 높이려고 한다! 우선 위에서 언급한 기존 Tooltip 컴포넌트 중 하나인 <tip-button />의 개선점을 알아보자!
<tip-button/>이 Button과 Tooltip의 기능을 모두 포함하고 있어, Text, Image과 같이 Tooltip이 필요한 다른 곳에서 사용할 수 없다.<tip-button/>을 사용하는 쪽에서position이static이 아닌 부모 태그를 항상 넣어줘야 한다.<tip-button/>은 매번 Tooltip의 width를 넘겨주어야 하는데, 이런 경우 워딩이 수정되면 width 값을 같이 수정해야 한다. 또, 다국어 지원 시 width 분기 코드가 들어가야 한다.
새로운 Tooltip 컴포넌트 구현하기
PortalVue 라이브러리 사용
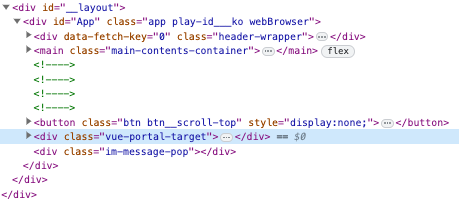
Tooltip이 다른 컴포넌트에게 가려지지 않게 하기 위해 HTML 최상단으로 뺄 필요가 있다. 그 이유는 <v-tooltip/>을 사용하는 쪽에서 z-index를 아무리 높게 준다 한들 z-index 비교 대상은 형제 노드끼리 비교하기 때문에 <v-tooltip/>보다 상위에 정의된 LNB나 GNB에 의해 Tooltip이 가려질 수 있기 때문이다. 이와 관련해 Vue3에는 Teleport라는 기능을 지원하지만, Vue2에는 지원하지 않아 별도 라이브러리를 설치했다.
- PortalVue 사용법
1
2
3
4
5
6
7
8
9
10
11
12
13
14
15
16
17
<body>
  <portal-target name="destination">
    <!-- portal 하위에 선언된 엘리먼트가 렌더링되는 곳(P 태그) -->
  </portal-target>
  <main>
    <div>
      <div>
        <div>
          <!-- depth가 깊다고 가정 -->
          <portal to="destination">
            <p>나는 portal-target이 선언된 곳으로 이동한다.</p>
          </portal>
        </div>
      </div>
    </div>
  </main>
</body>
<portal-target />: 노드를 이동시킬 곳에 선언한다. 예를 들어 가장 상단 태그인<body />바로 하위에 선언할 수 있다.<portal />: 이동시킬 노드를 정의한다.
나는 <portal-target/>을 layout/default.vue에 선언하고 <portal/>을 components/atoms/VTooltip에 선언했다. 아래 코드를 보자!
layout/default.vue1 2 3 4 5 6 7 8 9 10
<template> <div id="App"> <v-header /> <main> <!-- 중략 ... --> </main> <!-- 중략 ... --> <portal-target id="tooltipPortal" name="tooltip" multiple /> </div> </template>
components/atoms/VTooltip.vue1 2 3 4 5 6 7 8 9 10 11 12 13 14
<template> <div class="container_tooltip"> <!-- 중략 ... --> <portal to="tooltip"> <div v-if="isShowTooltip" class="wrapper_tooltip" :style="tooltipStyles" > <slot name="tooltip" /> </div> </portal> </div> </template>
Tooltip을 표시할 노드가 나타날 Portal이 잘 생성되었다!
activator와 tooltip slot 정의
1
2
3
4
5
6
7
8
9
10
11
12
13
14
15
16
17
<template>
  <div class="container_tooltip">
    <div ref="activator" class="wrapper_activator" :style="activatorStyles">
      <slot name="activator" />
    </div>

    <portal to="tooltip">
      <div
        v-if="isShowTooltip"
        class="wrapper_tooltip"
        :style="tooltipStyles"
      >
        <slot name="tooltip" />
      </div>
    </portal>
  </div>
</template>
- activator slot: Tooltip을 활성화하는 노드가 위치한다. 활성화 조건은
hover,click이 있다. 예를 들어 Button, Icon, Text 등이 slot으로 들어올 수 있다. - tooltip slot: Tooltip이 위치하며 사용자가 Tooltip을 직접 정의할 수 있게 해 자유도를 높였다. (Tooltip의 스타일이 디자인에 따라 달라지는 이유로…)
JS로 위치 값 계산하기
Tooltip의 위치 값을 계산하기 위해 필요한 값은 아래와 같다.
- activator 좌표(x,y), width, height
- tooltip width, height
activator 관련 값을 가져오기 위해서 getBoundingClientRect() 함수를 사용해 가져올 수 있다. 하지만, tooltip 관련 값을 가져오기 위해 getBoundingClientRect() 함수를 사용했을 때 <portal/> 내부에서 v-show 를 사용하기 때문에 가져올 수 없다.(= display: none 일 경우 화면에 그려지지 않기 때문에 가져올 수 없다.)
따라서, <v-tooltip/> 컴포넌트 내부에 동일한 스타일의 Tooltip 노드를 하나 더 생성해 visibility: hidden 값을 줘서 안 보이도록 한 후 해당 노드를 통해 tooltip의 width, height을 가져오도록 했다. 아래 코드를 보자!
1
2
3
4
5
6
7
8
9
10
11
12
13
14
15
16
17
18
19
20
21
22
23
24
25
26
27
28
29
30
31
32

<template>
  <div class="container_tooltip">
    <div ref="activator" class="wrapper_activator" :style="activatorStyles">
      <slot name="activator" />
    </div>

    <portal to="tooltip">
      <div
        v-if="isShowTooltip"
        class="wrapper_tooltip"
        :style="tooltipStyles"
      >
        <slot name="tooltip" />
      </div>
    </portal>

    <!-- Tooltip 너비, 높이 값을 가져오기 위한 미러링 태그 -->
    <div
      ref="mirroringTooltip"
      :style="{
        position: 'fixed',
        top: 0,
        left: 0,
        whiteSpace: 'pre',
        visibility: 'hidden'
      }"
    >
      <slot name="tooltip" />
    </div>
  </div>
</template>
아래 코드는 Tooltip을 위치 계산 함수이다.
1
2
3
4
5
6
7
8
9
10
11
12
13
14
15
16
17
18
19
20
21
22
23
24
25
26
27
28
29
30
31
32
33
34
35
36
37
38
39
40
41
42
43
44
45
46
47
48
49
50
51
52
53
54
55
56
57
58
59
60
61
62
63
64
65
66
67
68
69
70
71
72
getTooltipPosition(placement) {
  const { activator, mirroringTooltip } = this.$refs
  const {
    x: activatorX,
    y: activatorY,
    width: activatorWidth,
    height: activatorHeight
  } = activator.getBoundingClientRect()
  const {
    width: tooltipWidth,
    height: tooltipHeight
  } = mirroringTooltip.getBoundingClientRect()

  let left = 0
  let top = 0
  switch (placement) {
    case 'bottom_center':
      left = activatorX + activatorWidth / 2 - tooltipWidth / 2
      top = activatorY + activatorHeight + this.gap
      break
    case 'bottom_start':
      left = activatorX
      top = activatorY + activatorHeight + this.gap
      break
    case 'bottom_end':
      left = activatorX + activatorWidth - tooltipWidth
      top = activatorY + activatorHeight + this.gap
      break
    case 'top_center':
      left = activatorX + activatorWidth / 2 - tooltipWidth / 2
      top = activatorY - tooltipHeight - this.gap
      break
    case 'top_start':
      left = activatorX
      top = activatorY - tooltipHeight - this.gap
      break
    case 'top_end':
      left = activatorX + activatorWidth - tooltipWidth
      top = activatorY - tooltipHeight - this.gap
      break
    case 'left_center':
      left = activatorX - tooltipWidth - this.gap
      top = activatorY + activatorHeight / 2 - tooltipHeight / 2
      break
    case 'left_start':
      left = activatorX - tooltipWidth - this.gap
      top = activatorY
      break
    case 'left_end':
      left = activatorX - tooltipWidth - this.gap
      top = activatorY + activatorHeight - tooltipHeight
      break
    case 'right_center':
      left = activatorX + activatorWidth + this.gap
      top = activatorY + activatorHeight / 2 - tooltipHeight / 2
      break
    case 'right_start':
      left = activatorX + activatorWidth + this.gap
      top = activatorY
      break
    case 'right_end':
      left = activatorX + activatorWidth + this.gap
      top = activatorY + activatorHeight - tooltipHeight
  }

  return {
    top,
    left,
    right: left + tooltipWidth,
    bottom: top + tooltipHeight
  }
},
Props 설명
| Props | 설명 | 입력 값 |
| mode | tooltip을 활성화하는 방법 | - hover(default) - click |
| location | activator를 기준으로 한 tooltip의 위치 | - bottom(default) - top - left - right |
| align | activator를 기준으로 한 tooltip의 정렬 | - center(default) - start - end |
| gap | activator를 기준으로 한 tooltip의 정렬 | - 5(default) - 10, 11, 13, 20, ... |
| allowOverflow | tooltip이 활성화 됐을 때 viewport를 벗어나도 되는지 허용 여부 값이 false일 경우 viewport를 벗어나면 tooltip의 위치를 재조정함 | - false(default) - true |
사용 예시 코드
1
2
3
4
5
6
7
8
9
10
11
12
13
14
15
16
17
<template>
  <div class="page">
    <v-tooltip>
      <template #activator>
        <v-icon
          class="icon_activator"
          icon="notice_fill"
          color="#F54F4F"
          :size="100"
        />
      </template>
      <template #tooltip>
        <span class="txt_tooltip">Tooltip 내용입니다~</span>
      </template>
    </v-tooltip>
  </div>
</template>
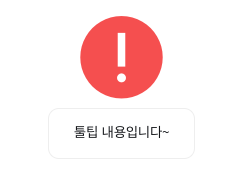
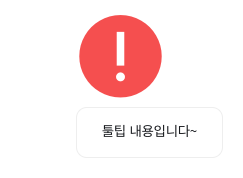
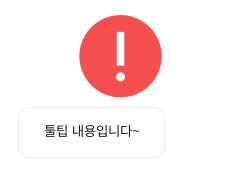
사용 예시 화면
Tooltip이 viewport에서 벗어날 경우 처리
Tooltip이 사용자가 보고 있는 화면에서 벗어날 경우 Tooltip 위치를 재조정해 스크롤링 없이 Tooltip 내용을 확인할 수 있도록 했다.
1
2
3
4
5
6
7
8
9
10
11
12
13
14
15
16
17
18
19
20
21
22
23
24
25
26
27
28
29
30
31
32
33
34
35
36
37
38
39
40
41
42
43
44
45
46
47
48
49
showTooltip() {
  if (this.isShowTooltip) return
  this.isShowTooltip = true

  this.$emit('onShowTooltip')
  const { scrollX, scrollY } = window

  if (!this.allowOverflow) {
    // viewport를 벗어난 경우 tooltip 위치 재조정
    const rePos = this.getAdjustedTooltipPosition()
    this.tooltipPos = { x: scrollX + rePos.left, y: scrollY + rePos.top }
  } else {
    const pos = this.getTooltipPosition(`${this.location}_${this.align}`)
    this.tooltipPos = { x: scrollX + pos.left, y: scrollY + pos.top }
  }
},

// tooltip이 viewport를 벗어났을 경우 tooltip 위치 재조정 함수
getAdjustedTooltipPosition() {
  // 현재 placement 가 viewport 에서 벗어나지 않았으면 early return
  const currPos = this.getTooltipPosition(`${this.location}_${this.align}`)
  if (!this.isOutOfViewport(currPos)) return currPos

  // location 별 overflow 체크 순서
  const checkOrderLocations = {
    bottom: ['bottom', 'top', 'left', 'right'],
    top: ['top', 'bottom', 'left', 'right'],
    left: ['left', 'right', 'bottom', 'top'],
    right: ['right', 'left', 'bottom', 'top']
  }
  const checkOrderLocation = checkOrderLocations[this.location]
  const checkOrderAligns = ['center', 'start', 'end']

  for (const location of checkOrderLocation) {
    for (const align of checkOrderAligns) {
      if (this.location === location && this.align === align) {
        continue
      }

      const pos = this.getTooltipPosition(`${location}_${align}`)
      if (!this.isOutOfViewport(pos)) {
        return pos
      }
    }
  }

  // 모든 placement 가 viewport 에서 벗어날 경우 위치를 조정하지 않고 그대로 반환함.
  return this.getTooltipPosition(`${this.location}_${this.align}`)
},
allowOverflow Props를 통해 on/off할 수 있다.
리팩터링
적용 전
1
2
3
4
5
6
7
8
9
10
11
12
13
14
<tip-button
  class="btn__favorite"
  :icon="isFavorite ? 'favorite_fill' : 'favorite'"
  :class="{ active: isFavorite }"
  :btn-size="42"
  :icon-size="20"
  :tip-pos="{
    position: 'top',
    align: 'center',
    width: $i18n.locale === 'ko' ? 61 : 70
  }"
  :tooltip="즐겨찾기"
  @click="handleClick('favorite')"
/>
적용 후
1
2
3
4
5
6
7
8
9
10
11
12
13
14
15
16
17
18
19
<v-tooltip :gap="6">
  <template #activator>
    <button
      class="btn btn__favorite"
      :class="{ active: isFavorite }"
      @click="handleClick('favorite')"
    >
      <v-icon
        :icon="isFavorite ? 'favorite_fill' : 'favorite'"
        :size="20"
      />
    </button>
  </template>
  <template #tooltip>
    <p class="txt_btn_tooltip">
      즐겨찾기
    </p>
  </template>
</v-tooltip>
결론
Button의 역할과 Tooltip의 역할이 분리되어 Tooltip은 Button 뿐만 아니라 Text, Image 등 다양한 요소에 적용할 수 있게 되었다. (๑•̀ㅂ•́)و
